Assets and Collections
Back in the project, you will be greeted with the Clustta file browser. As yet, we haven't created anything so let us go ahead and do so.
Files and folders in your native file browser are referred to as Assets and Collections respectively in Clustta.
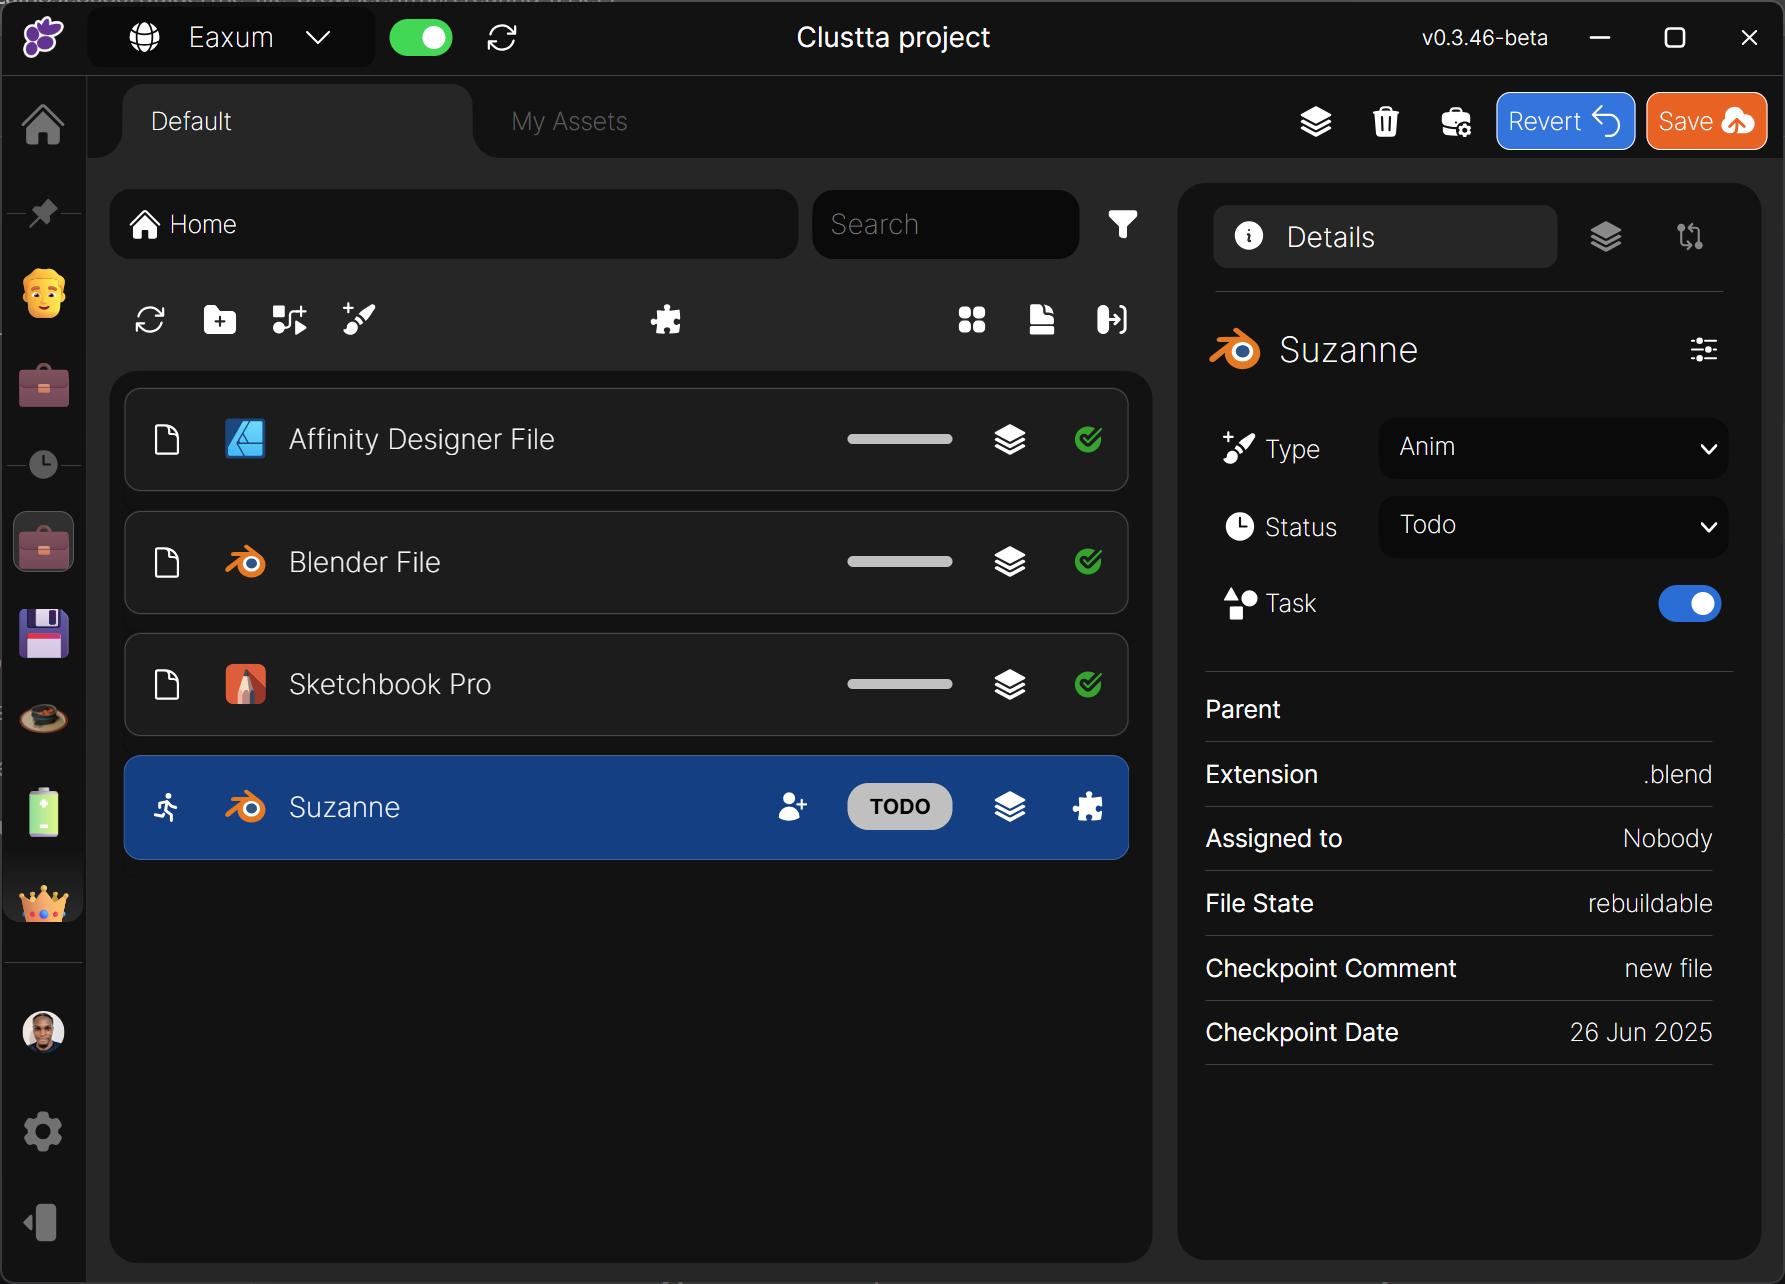
Assets
Think of an asset as anything you work with: a video, an image, a PDF, a Photoshop file (PSD), or even a Blender file (BLEND). It could also be a weblink that takes you to online tools like Canva, Figma, or Pinterest.
To make it easy to find what you need, assets can have extra information like Tags and Types to help you search and filter through everything.
Creating Assets
Assets can be created in two ways:
- By adding a file(s) to the Clustta Working folder location in your native file browser.
- By creating it from within Clustta using Asset templates
Method 1: Adding files to the native file browser.
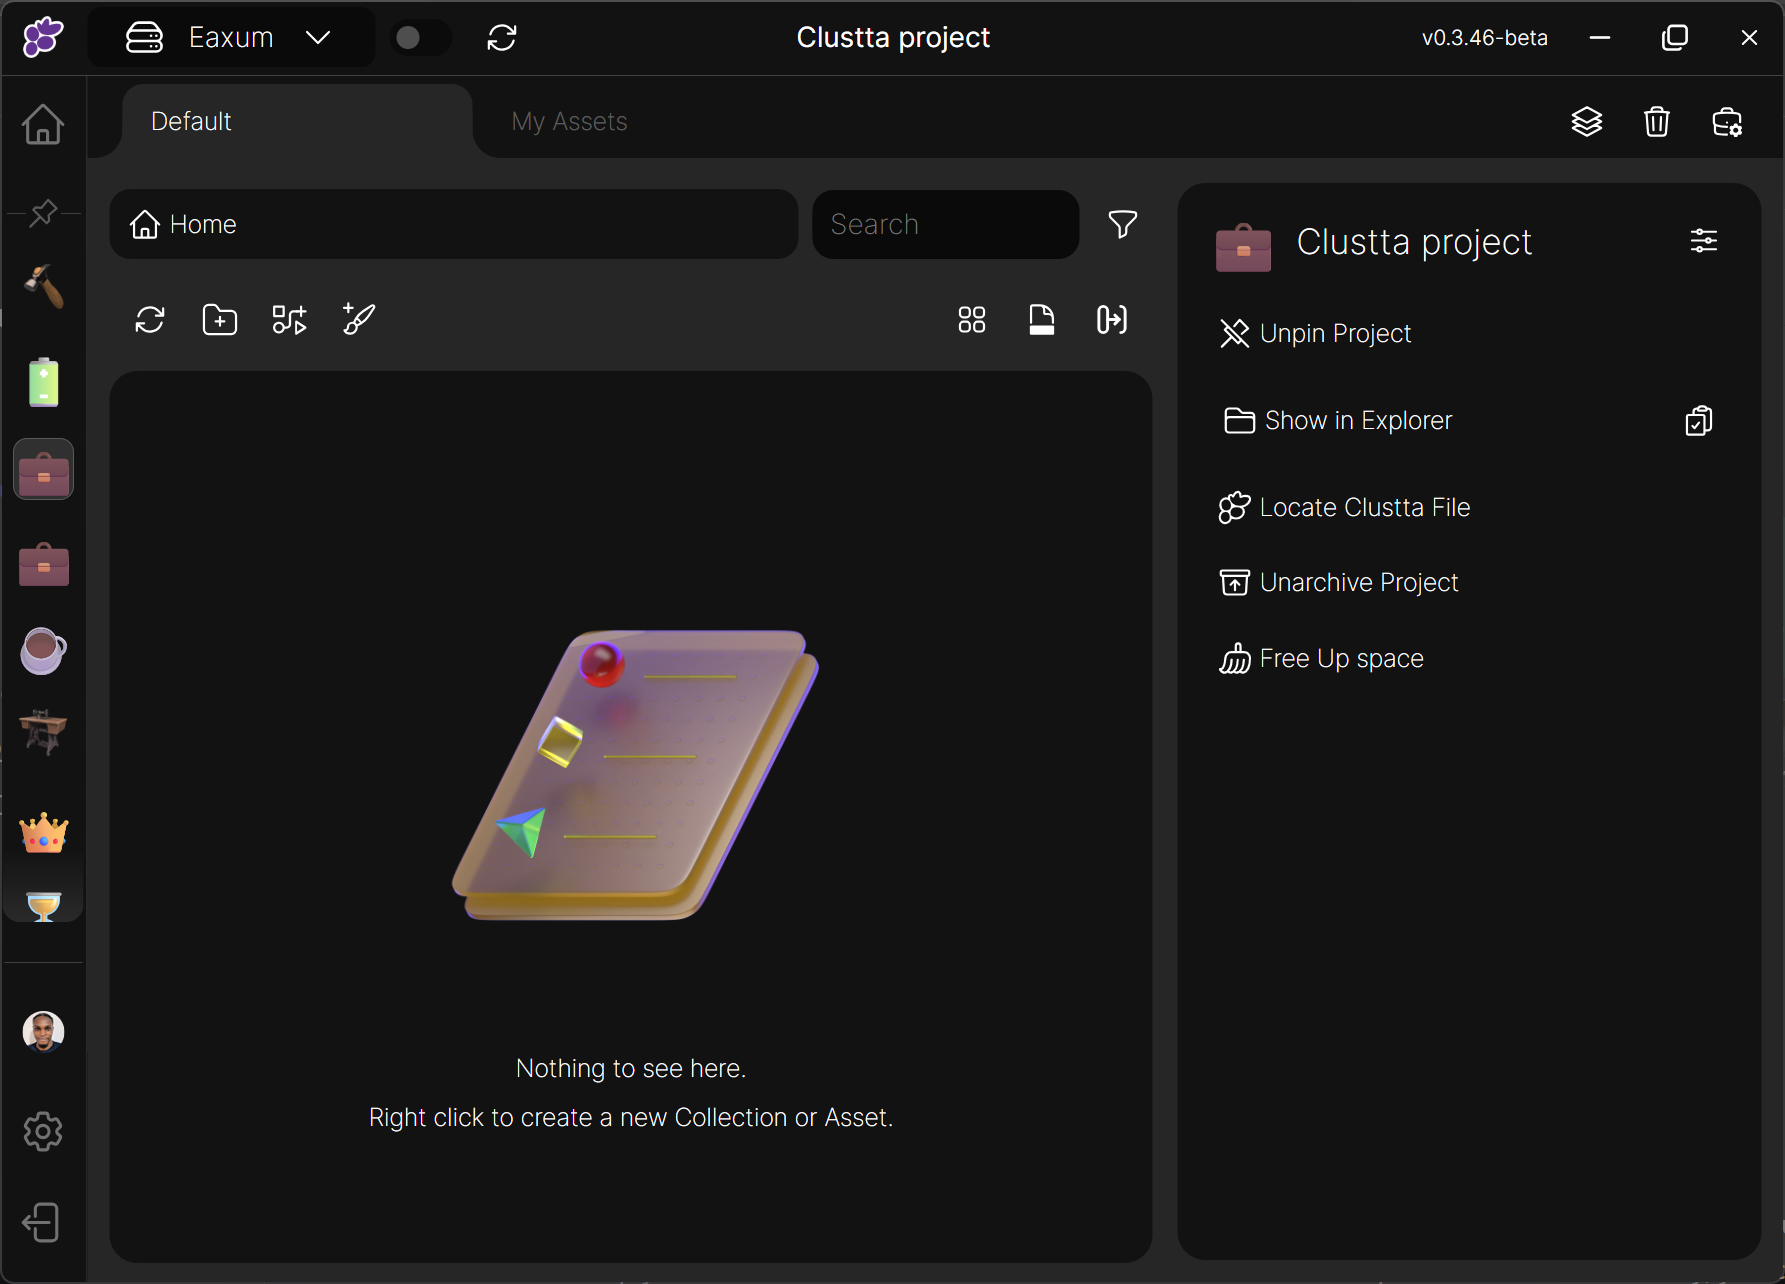
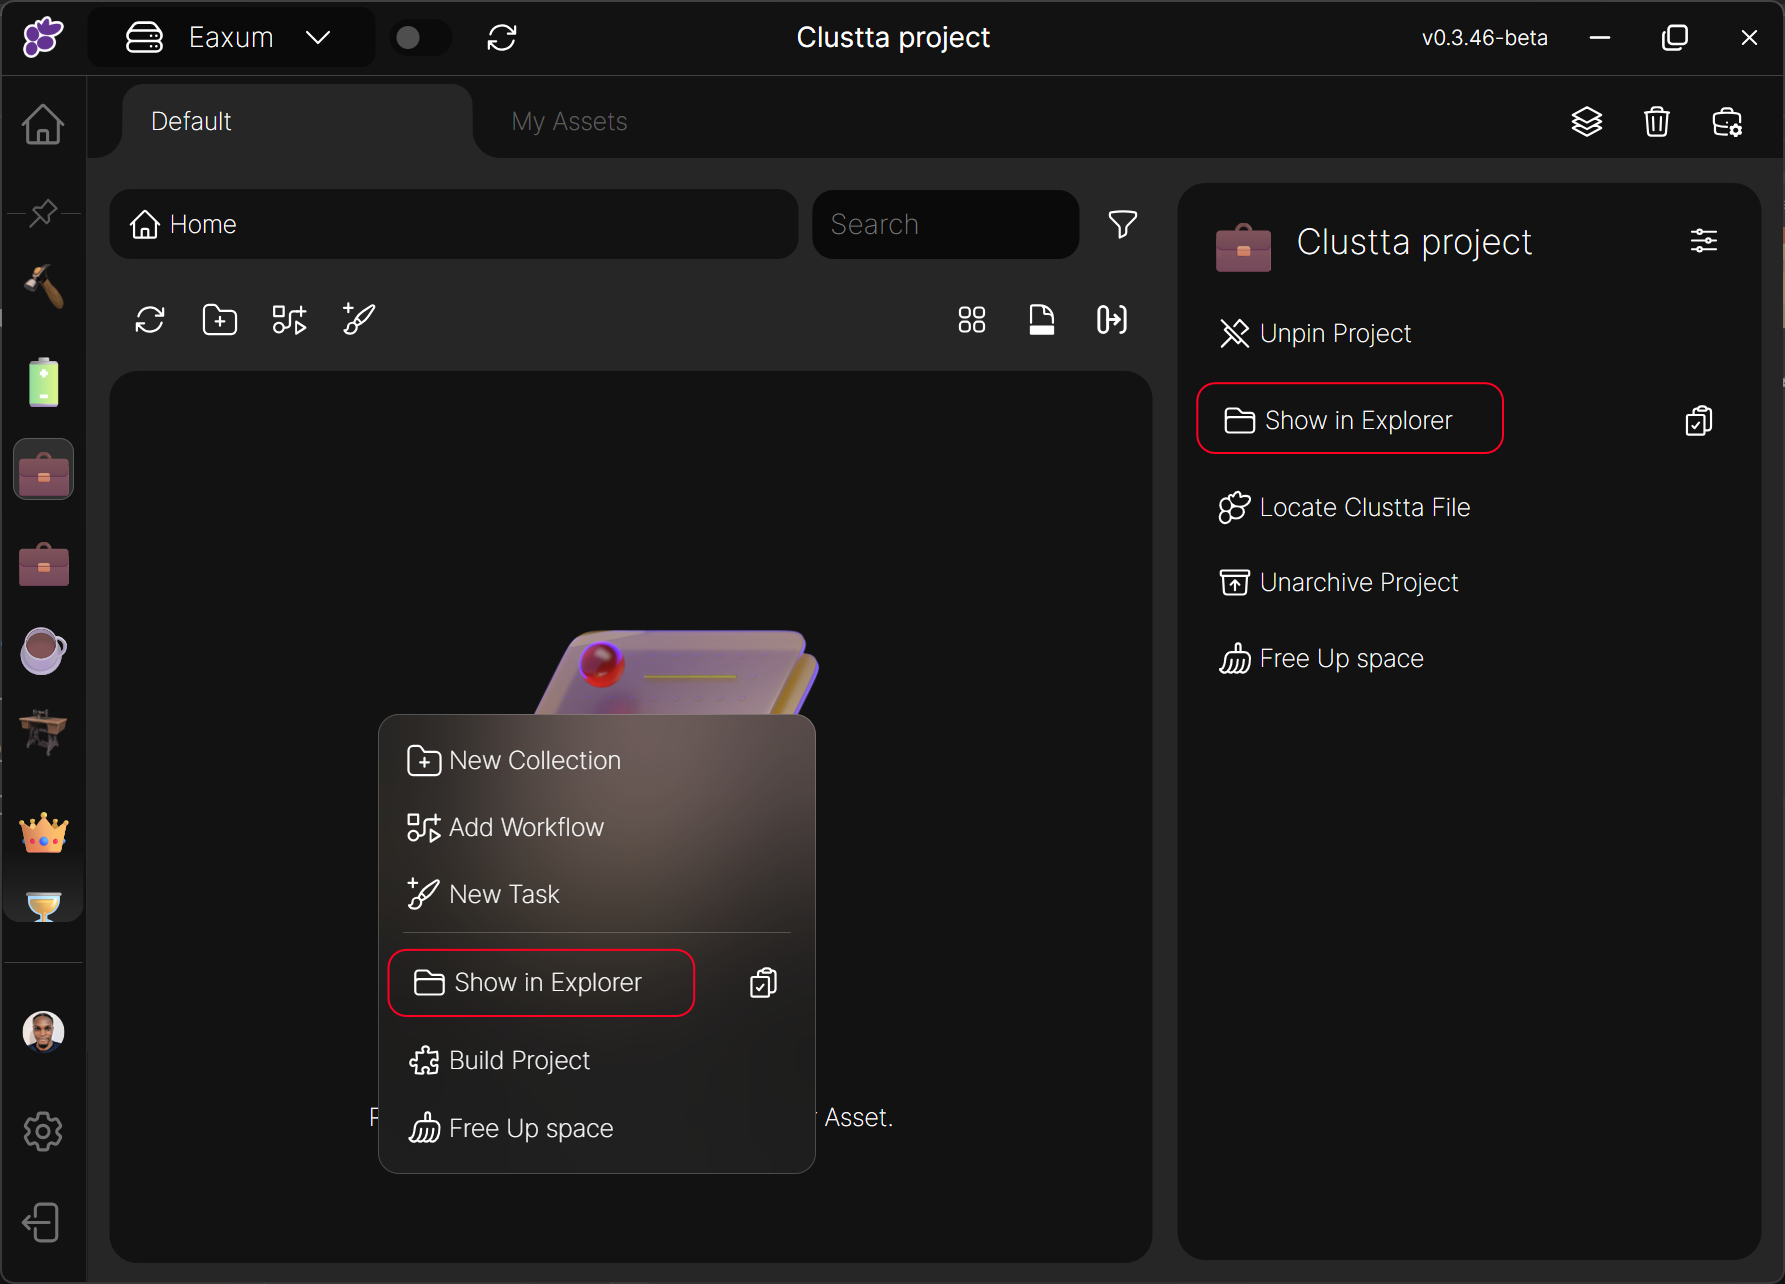
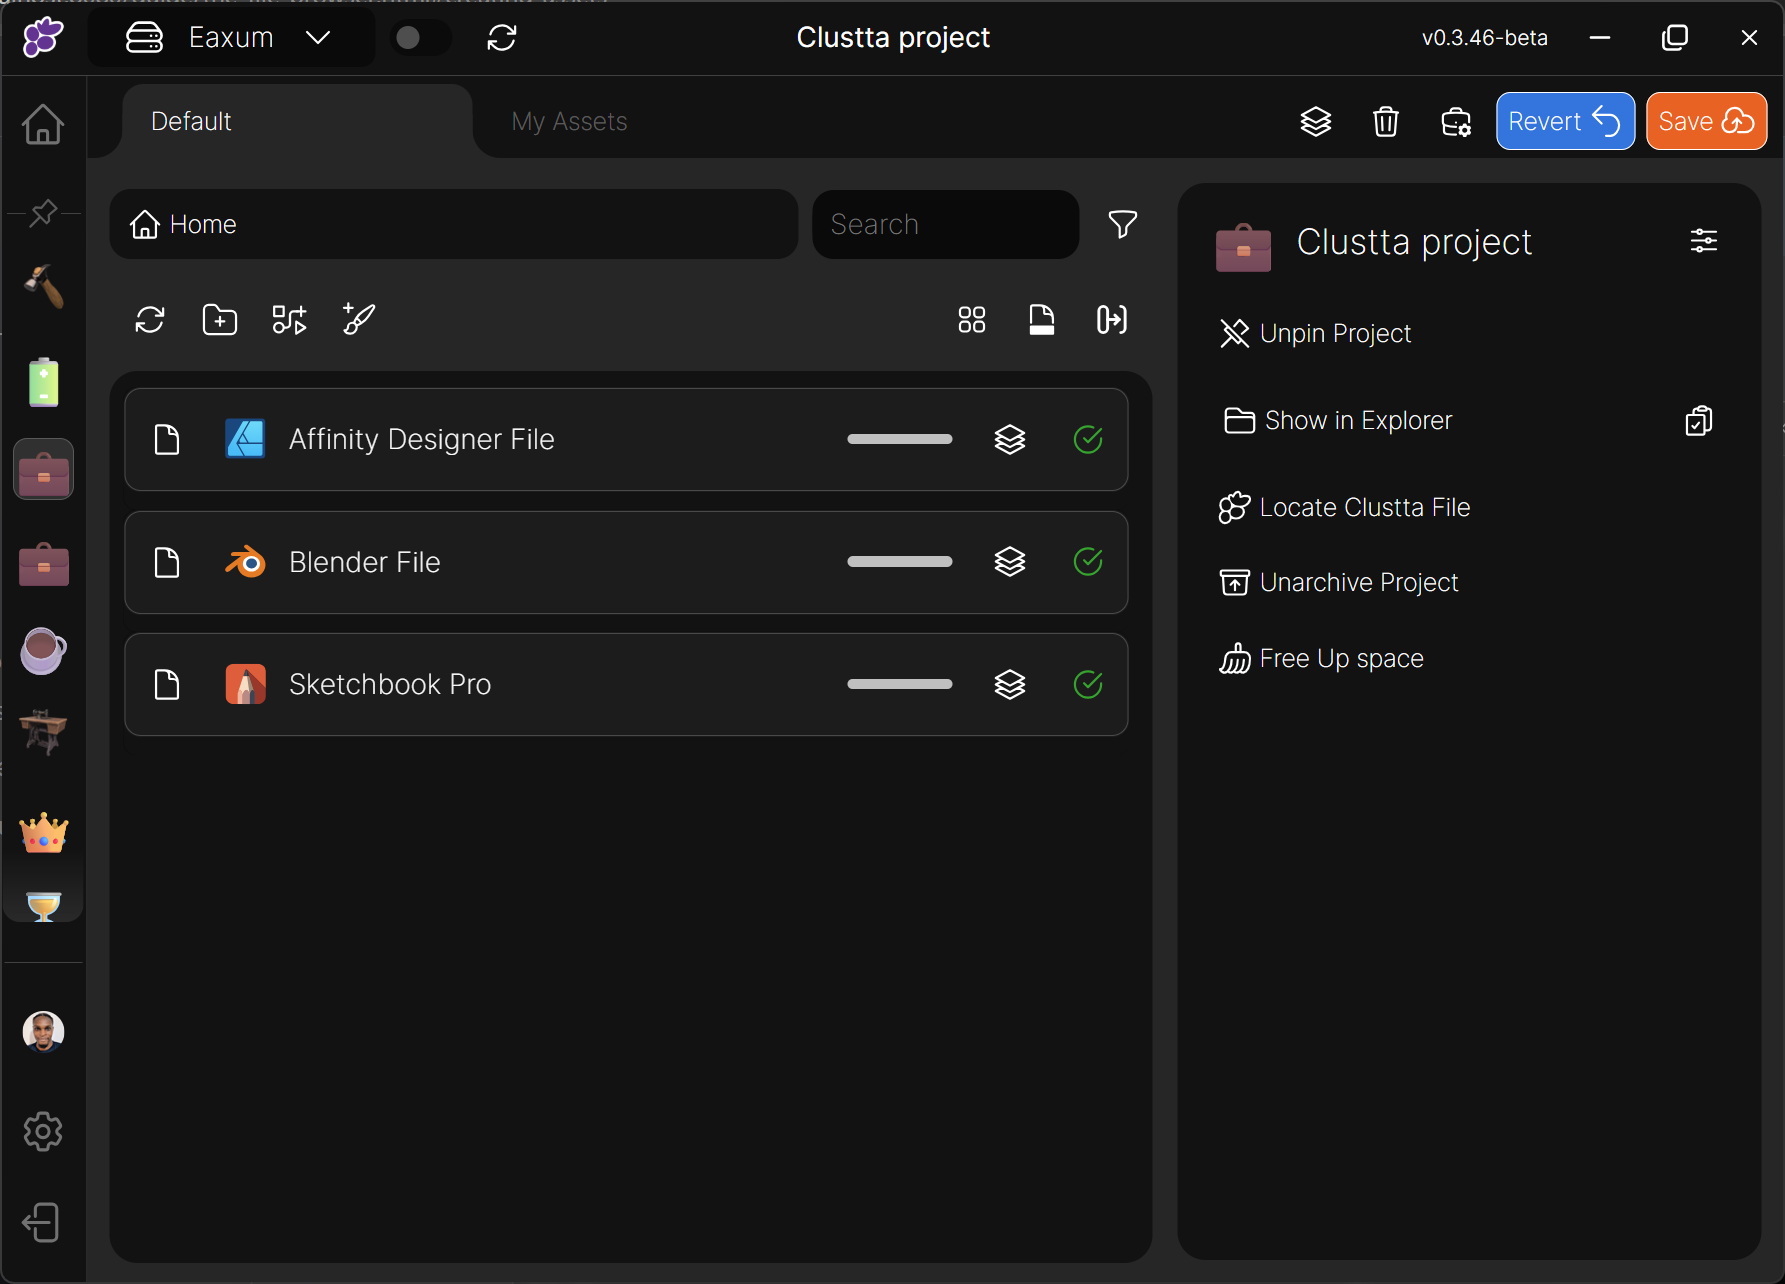
The most straight foward way to get stuff into Clustta is by just adding files into the project working folder. To access the project working folder, you can either click on the show in explorer button on the Details pane (by the right) or right click on an empty area in the file browser to show the project context menu; click Show in Explorer to reveal the working folder.
Tip
You can also copy the path to the location by clicking the clipboard icon. From within your software (e.g Blender, Photoshop), you can then paste this path in the dialogue that pops up whenever you're required to save your file.
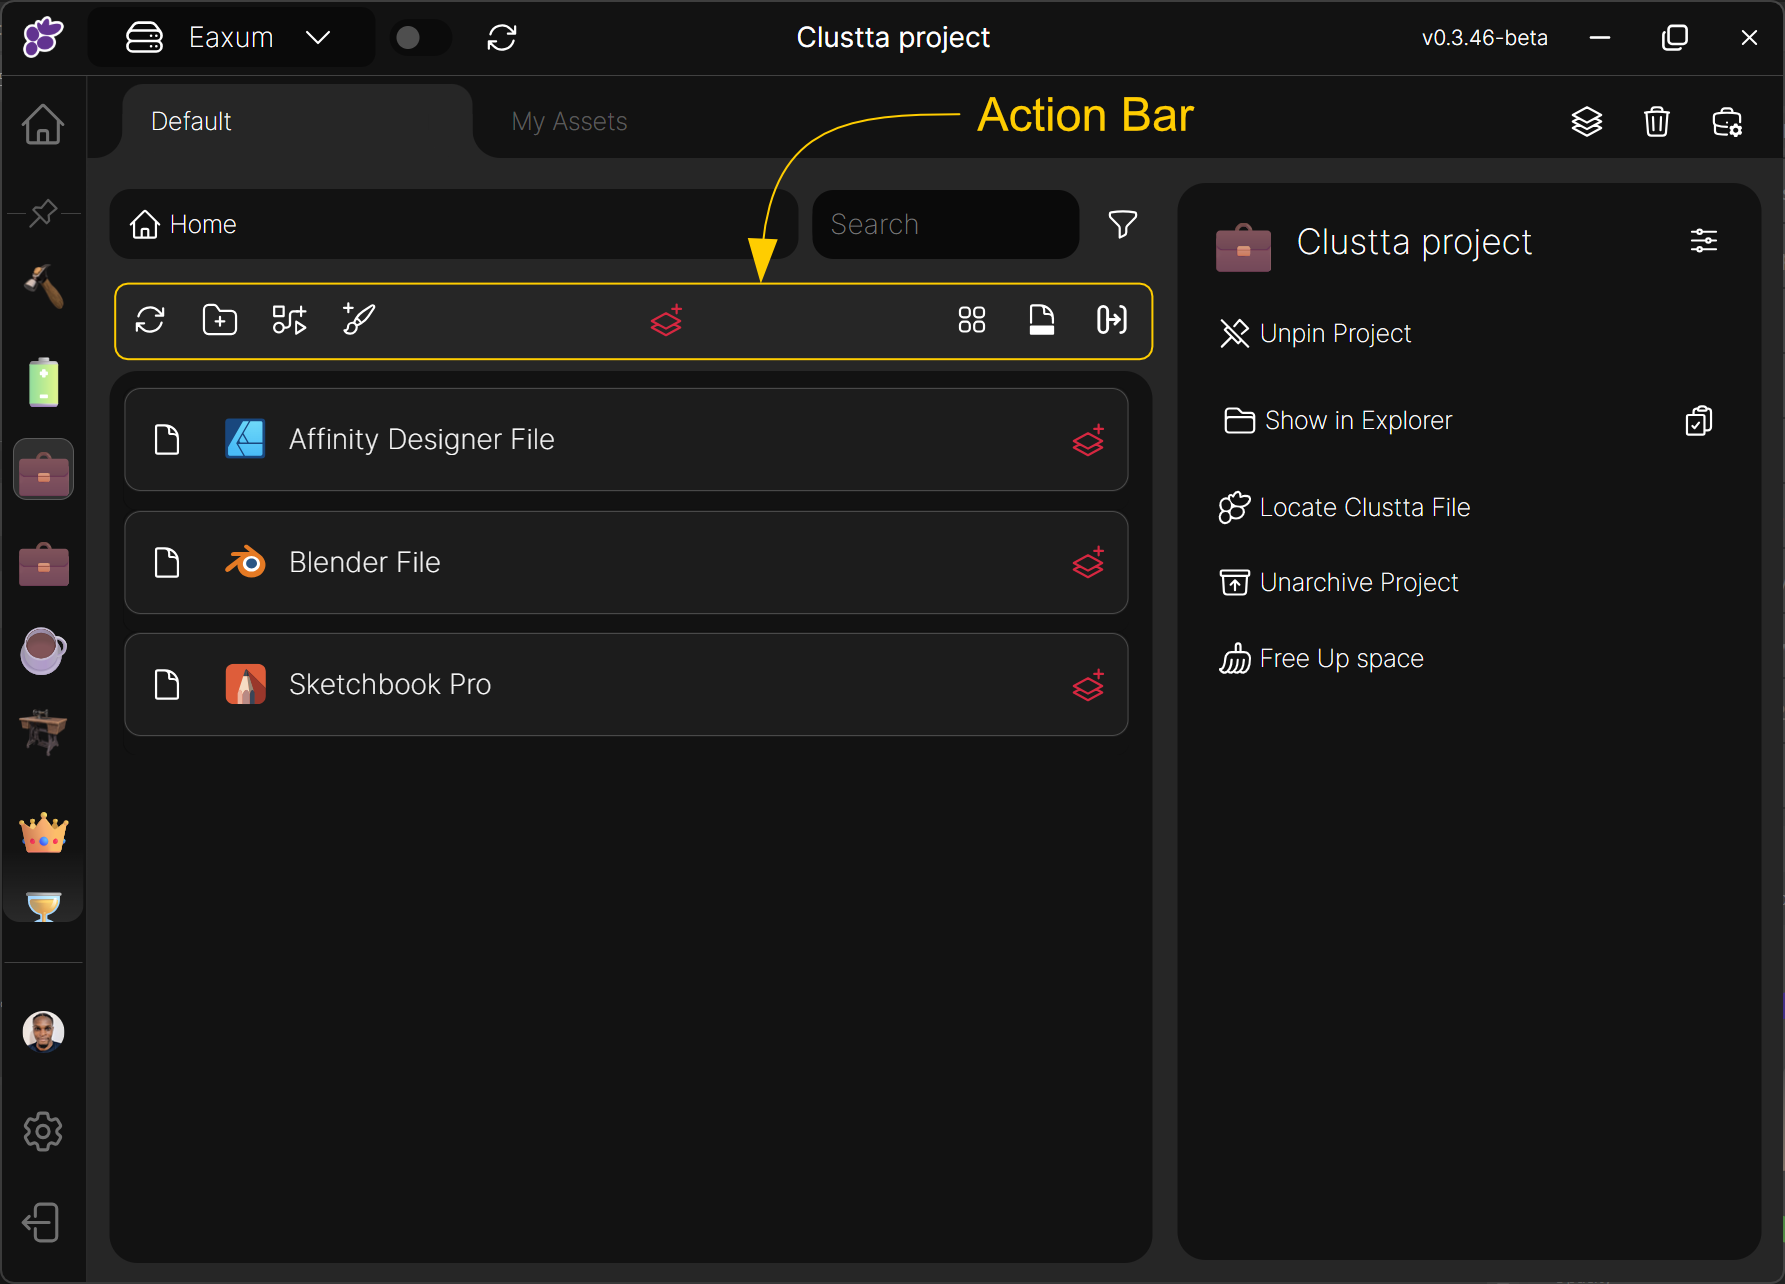
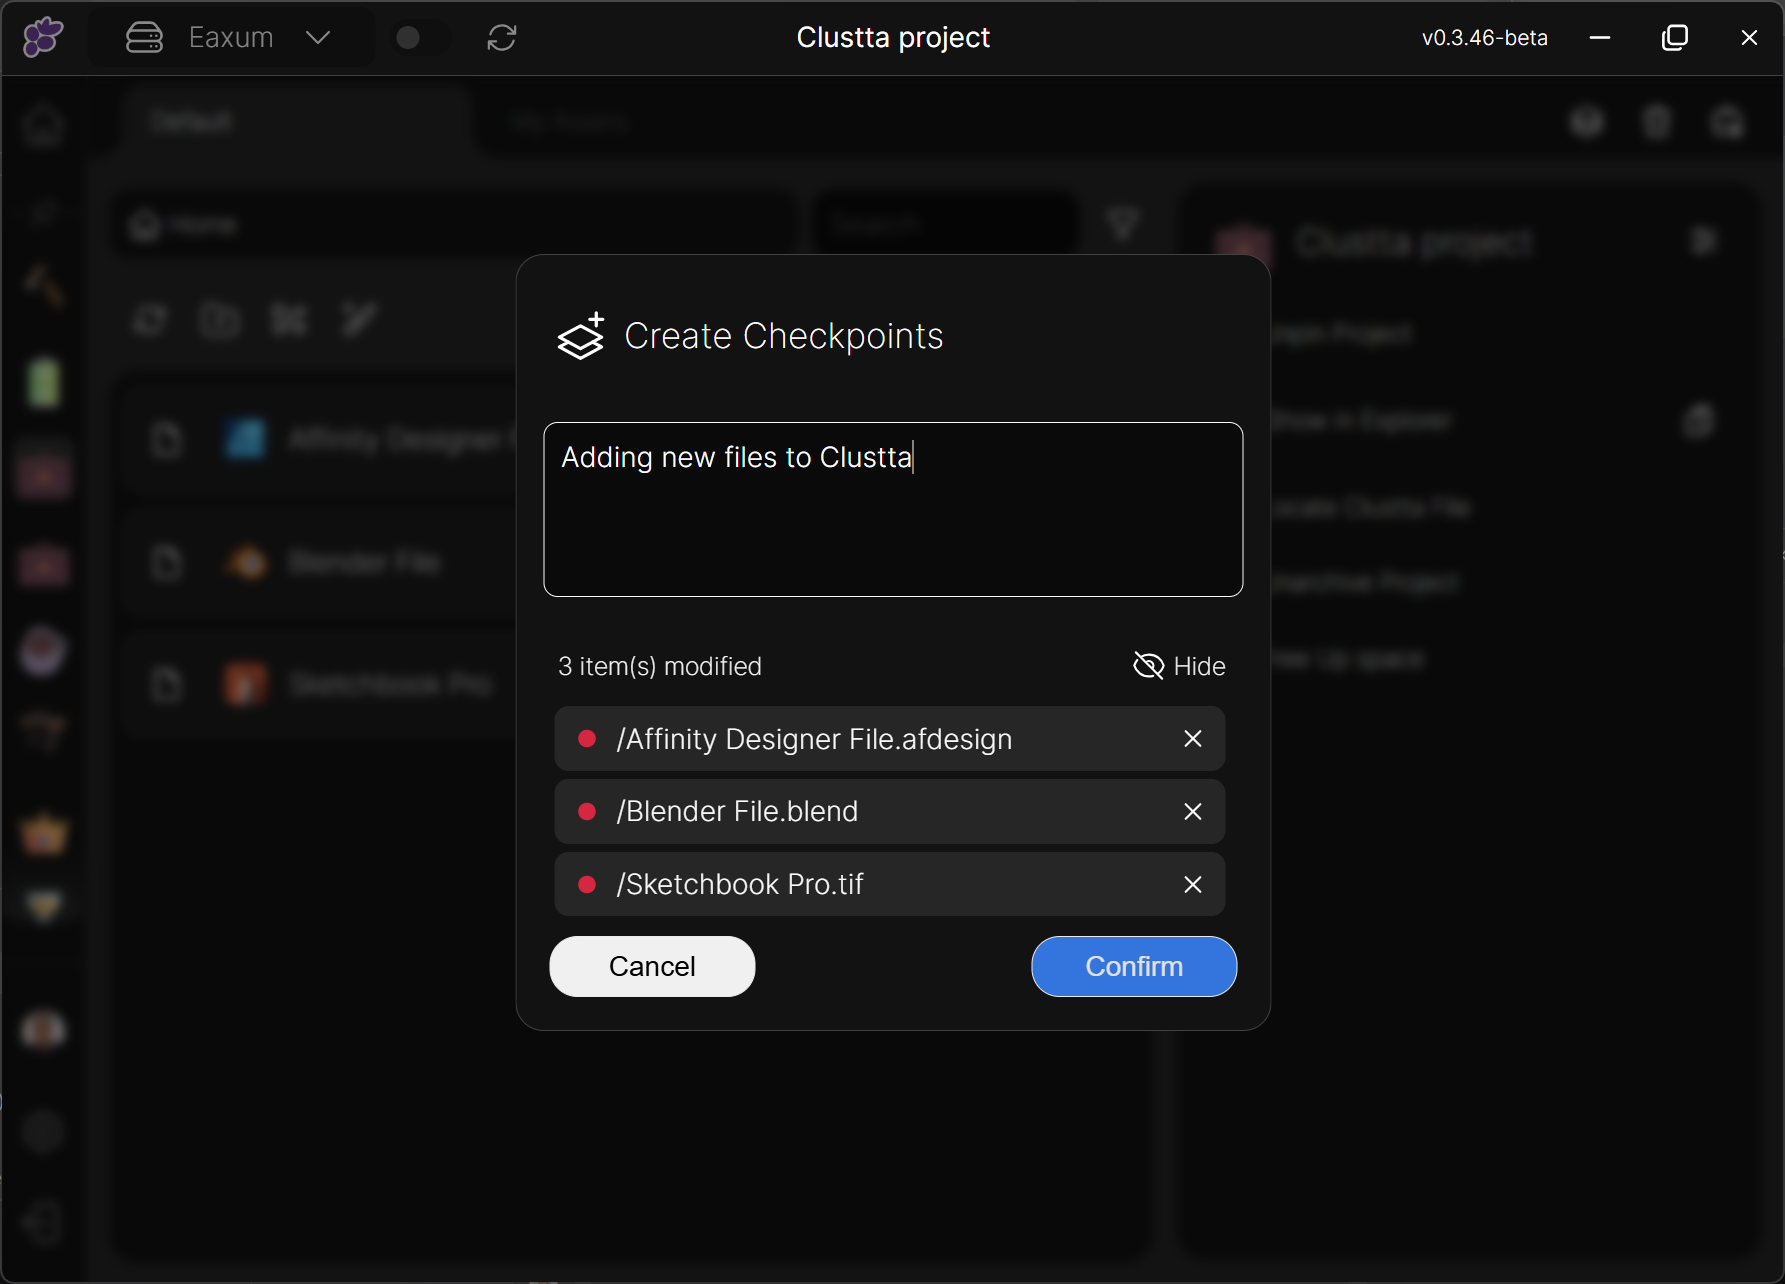
Clustta always scans your project location and whenever new items are detected, the Add checkpoint button would appear on the Action bar (at the top of the asset browser) as well as on the newly detected asset or collection.
INFO
If you cant see the newly added assets in Clustta, click on the Refresh icon on the action bar.
Clicking on the on the Add checkpoint button will trigger a modal prompting you to add a descriptive comment for the new checkpoint. Go ahead and click on Confirm.
Clustta will register these assets and now:
- Whenever you make modifications to the working files, Clustta will track the changes; giving you the option to add new checkpoints efficiently without duplicating the files.
- If you are working on a Synced project, your collaborators can access these files from their own computers.
Tip
You need to 'Save' these changes so Clustta can upload your files to the Server to back it up as well as share with your collaborators.
Method 2: Creating from within Clustta using Asset templates
Asset templates are a powerful feature in Clustta that allow you to pre-define and store starter files. Instead of repeatedly creating new files from scratch within your applications, you can use templates to instantly generate new assets with pre-configured content or settings.
Create assets using templates
- On the Action Bar, click on the New Asset button.

INFO
if you don't see this button, it's because you haven't added any templates to your project yet. Go to the project settings to add your templates.
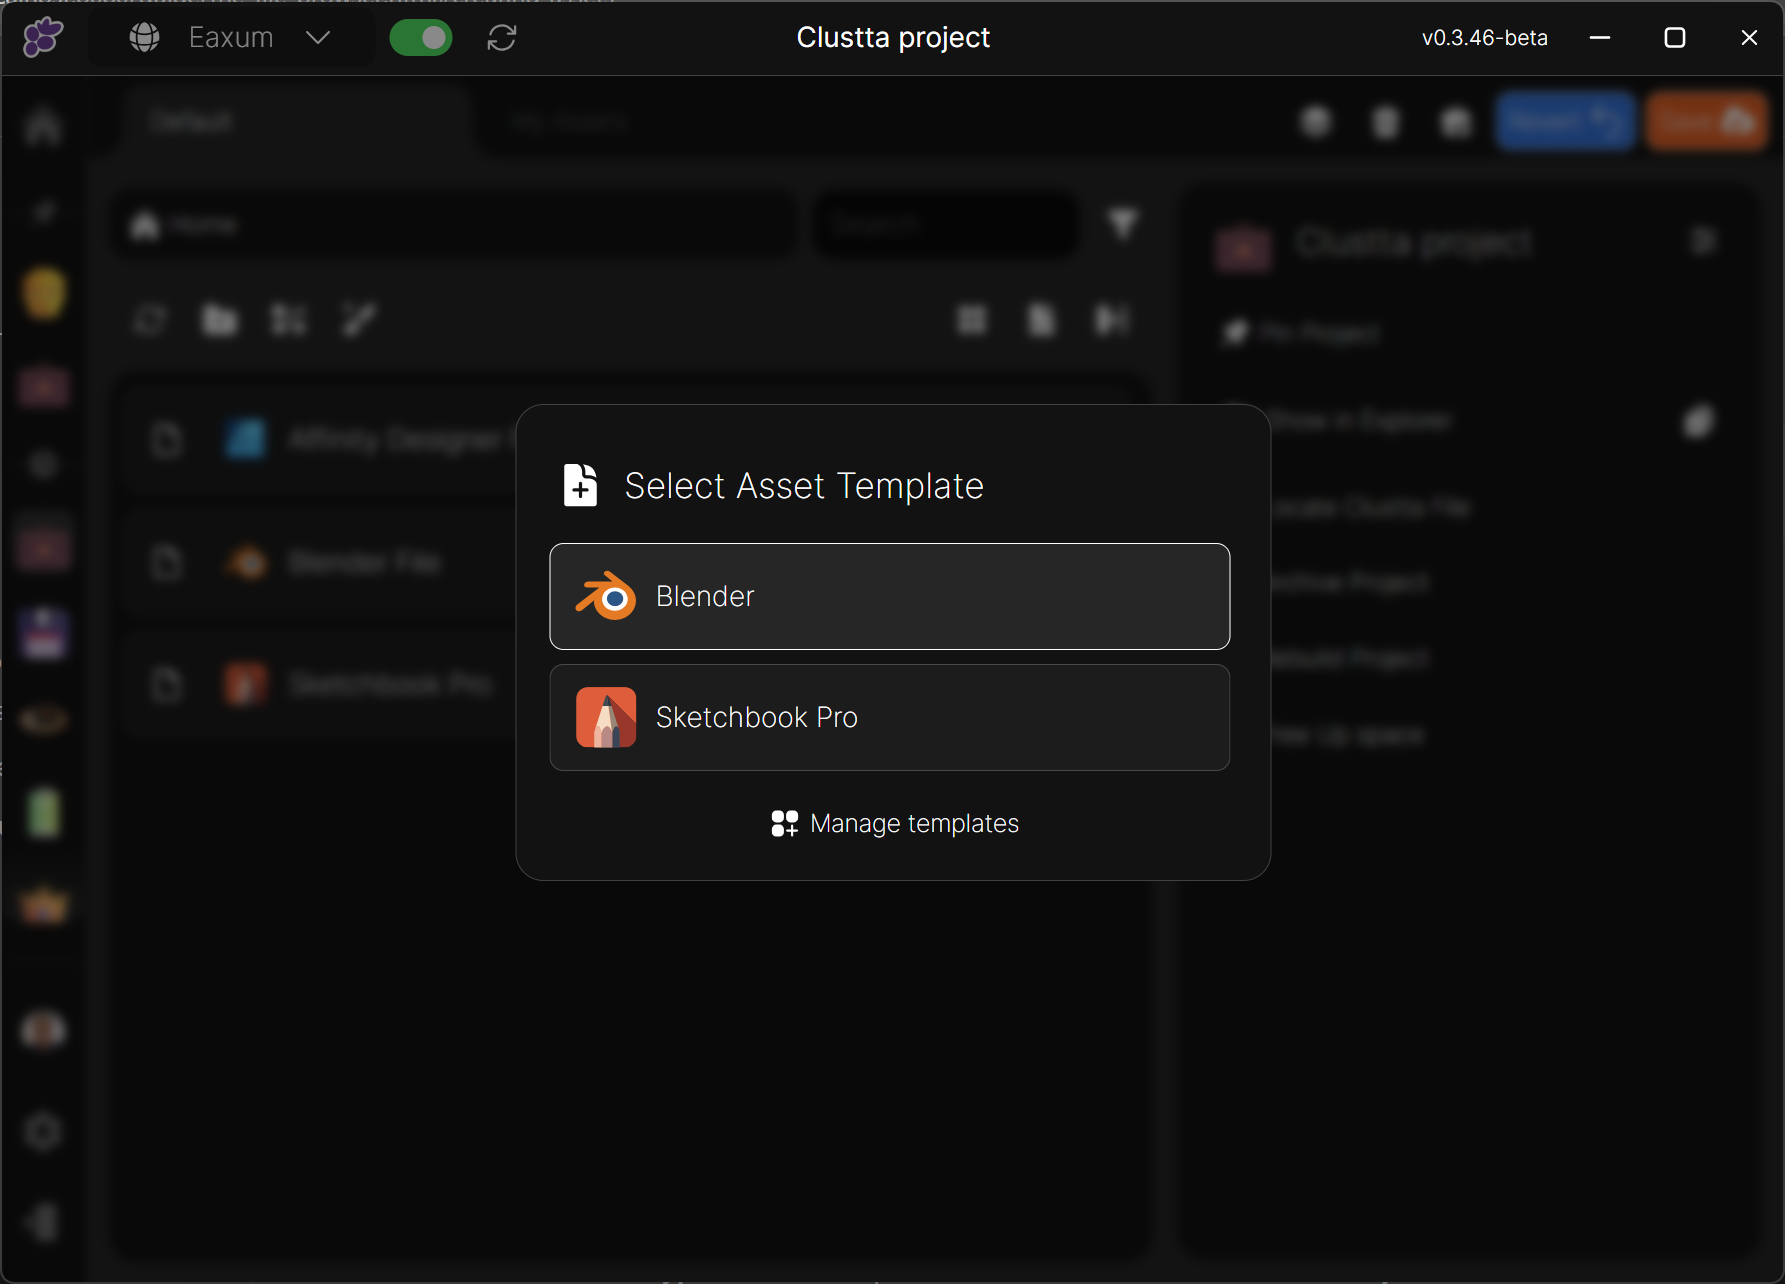
- A modal will pop up presenting you with asset templates you have previously added in your project configuration settings. Select the desired template.
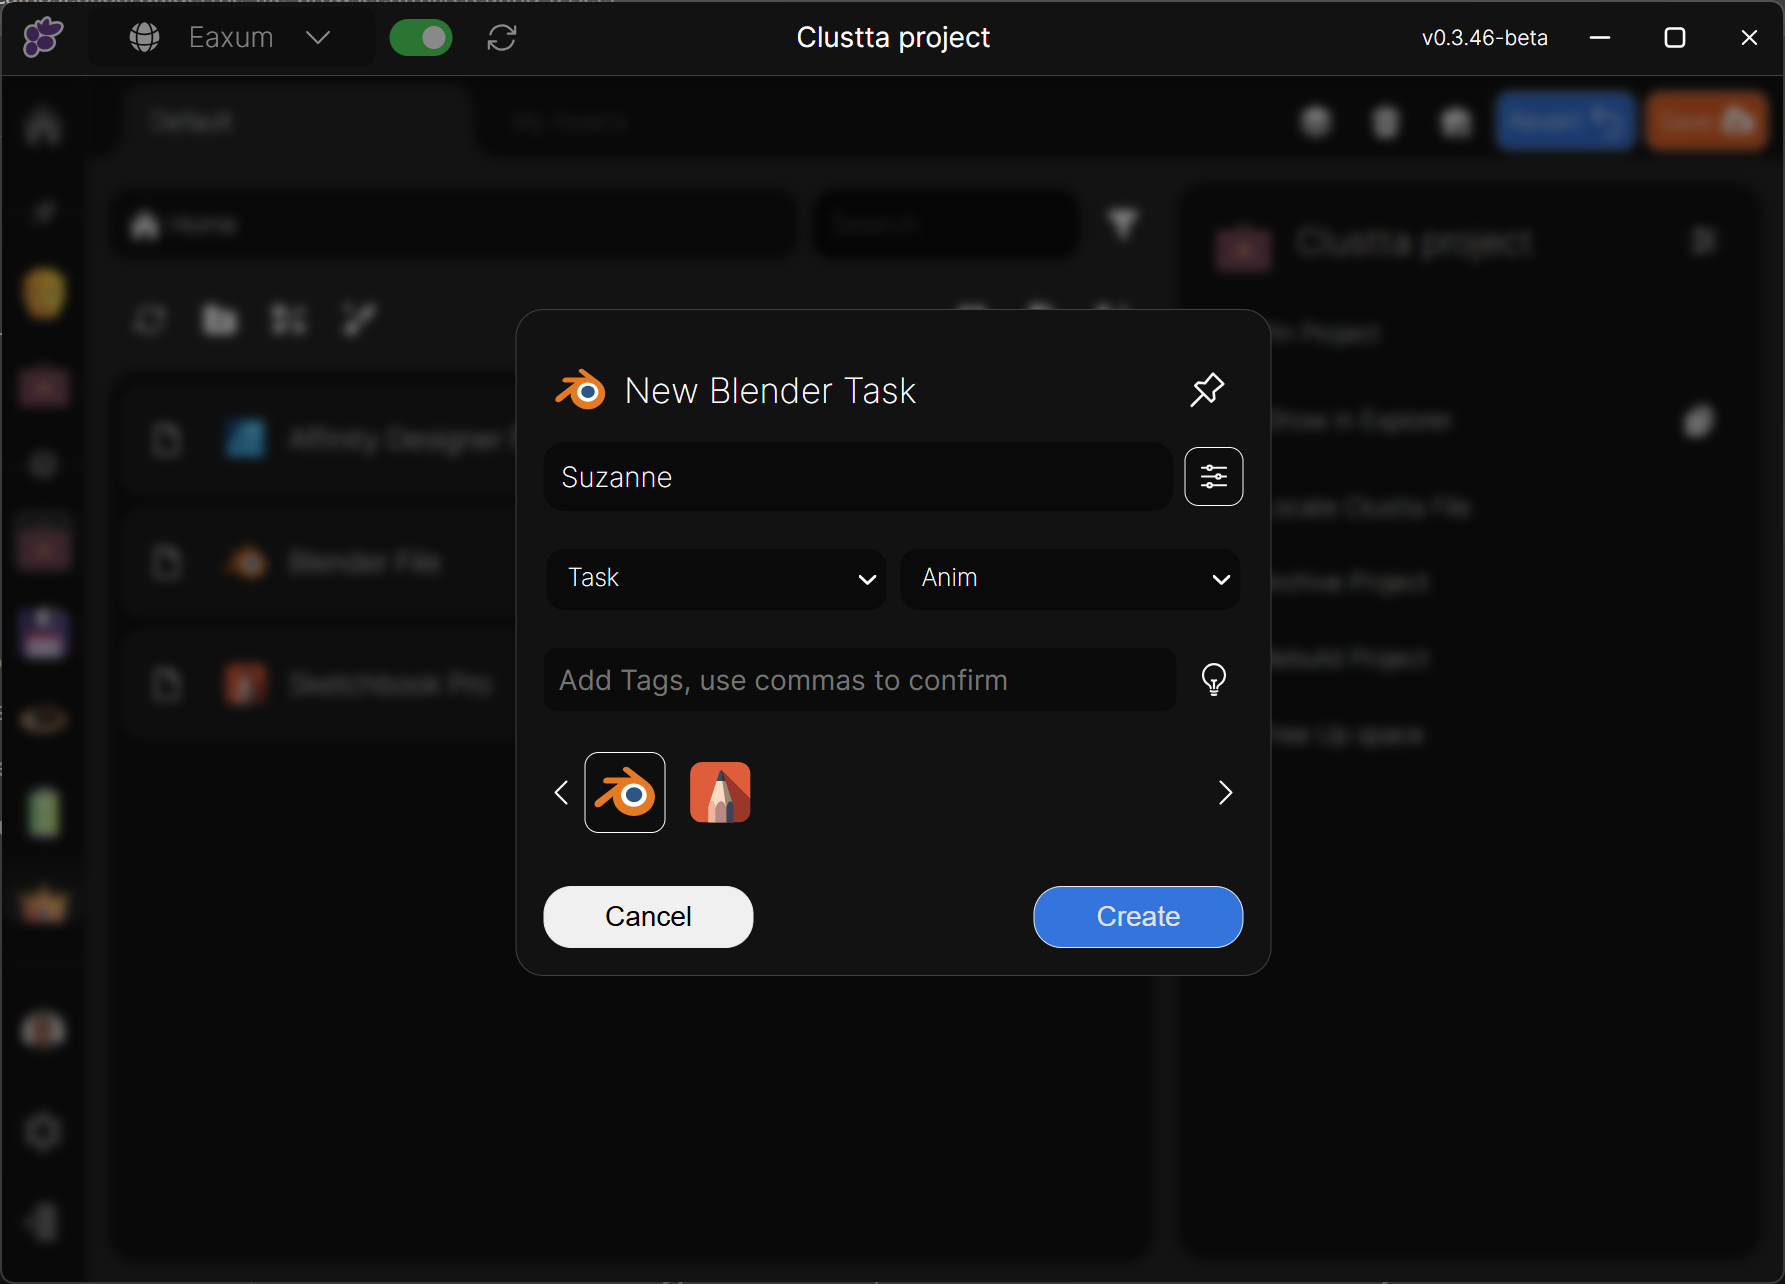
- Another modal gives you the option to configure your asset details and add metadata like Asset type and Tags.
Asset Metadata
• Name — A unique name for your asset.
• Type — Assets can be either Tasks or Resources. The primary difference is that you can assign a task to a collaborator and set a status to track its progress.
• Asset Type (Optional) — Defaults to Generic. Useful for classifying and filtering assets, e.g., Animation, Design, Concept Art, etc.
• Tags (Optional) — General-purpose tags for filtering and organization.
- Hit Confirm. Your new asset is created and ready to work with; You can double-click on the file to launch it.
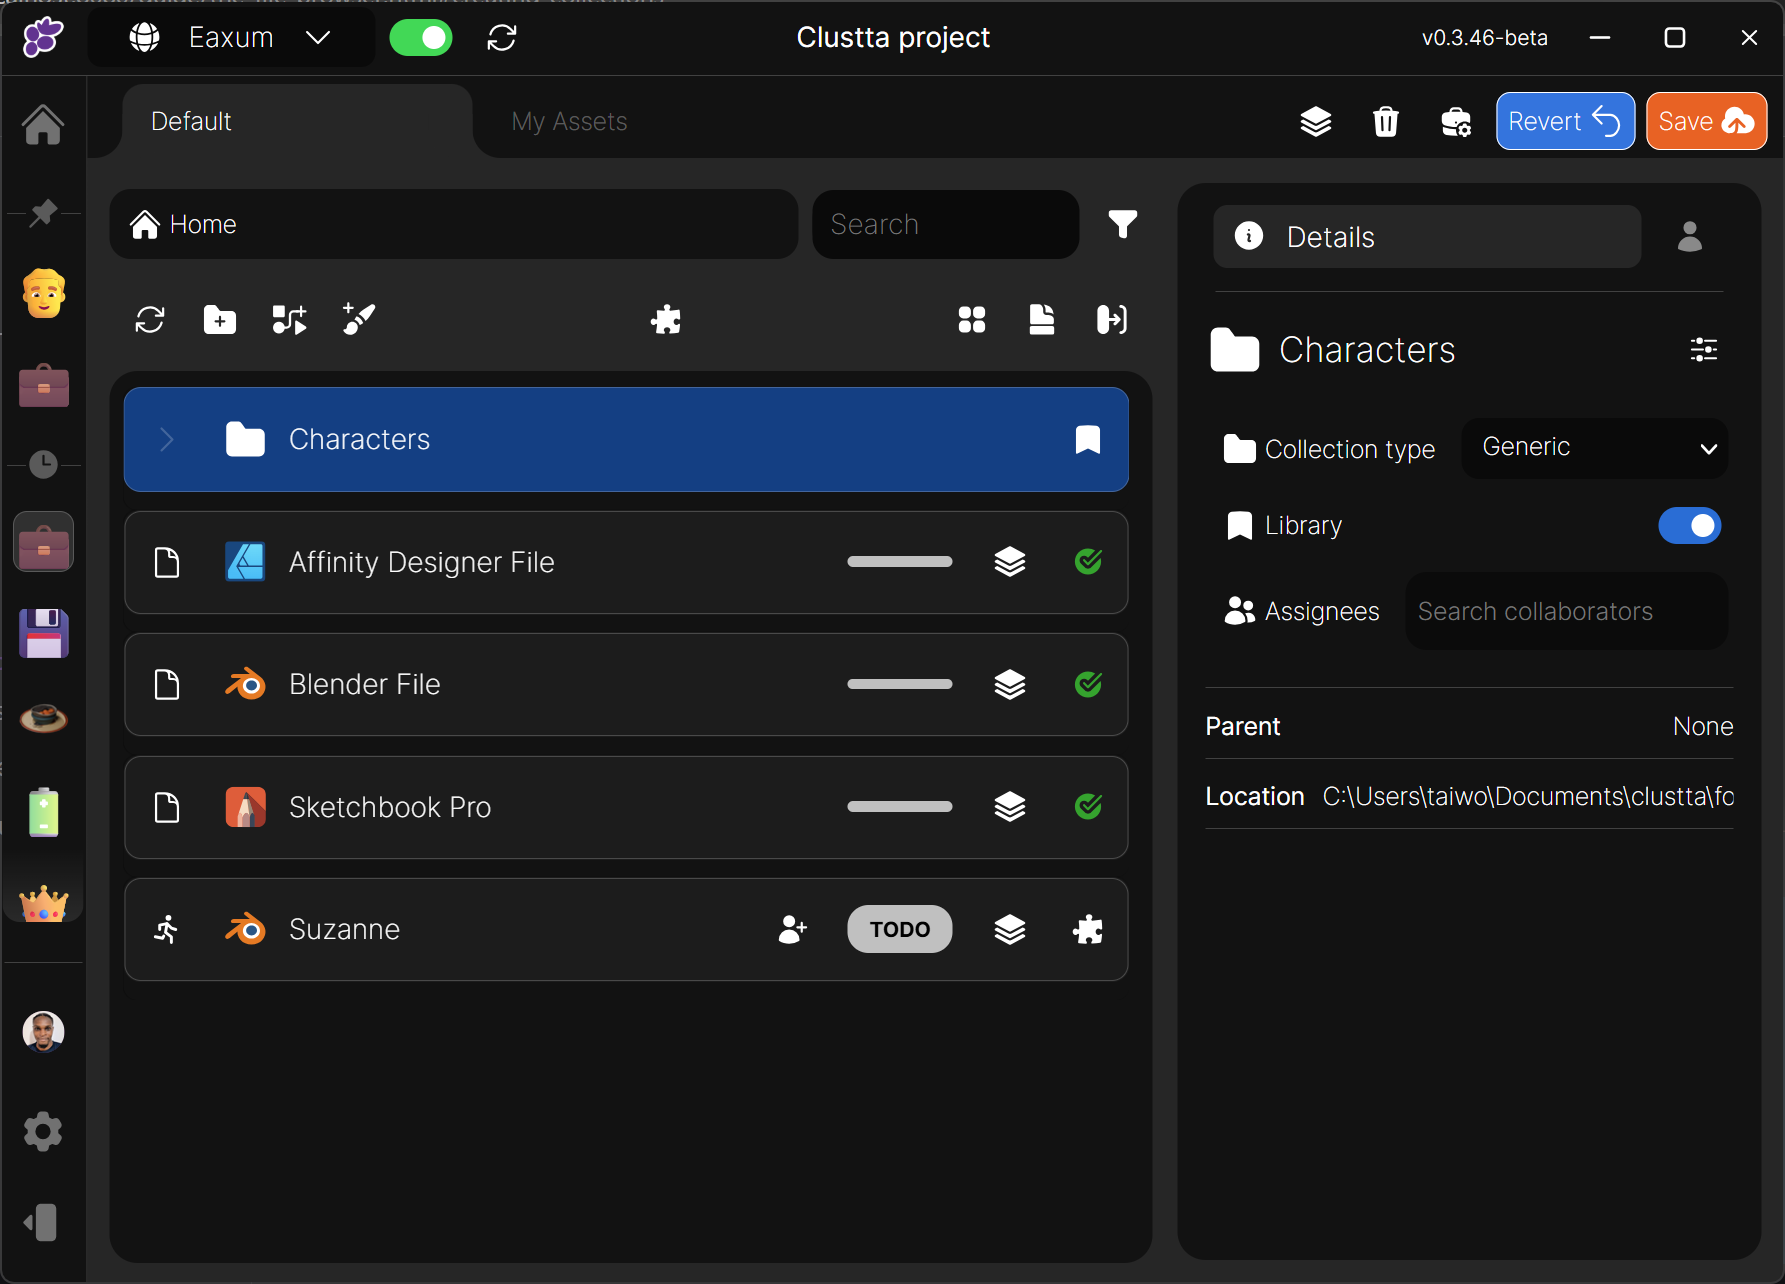
Collections
Collections are basically folders for organizing your assets.
Like assets, they can also have extra information like Types to help you search and filter while searching.
Creating Collections
- On the Action Bar, click on the Add collection button.

- A modal gives you the option to configure your collection details and add metadata like Collection type.
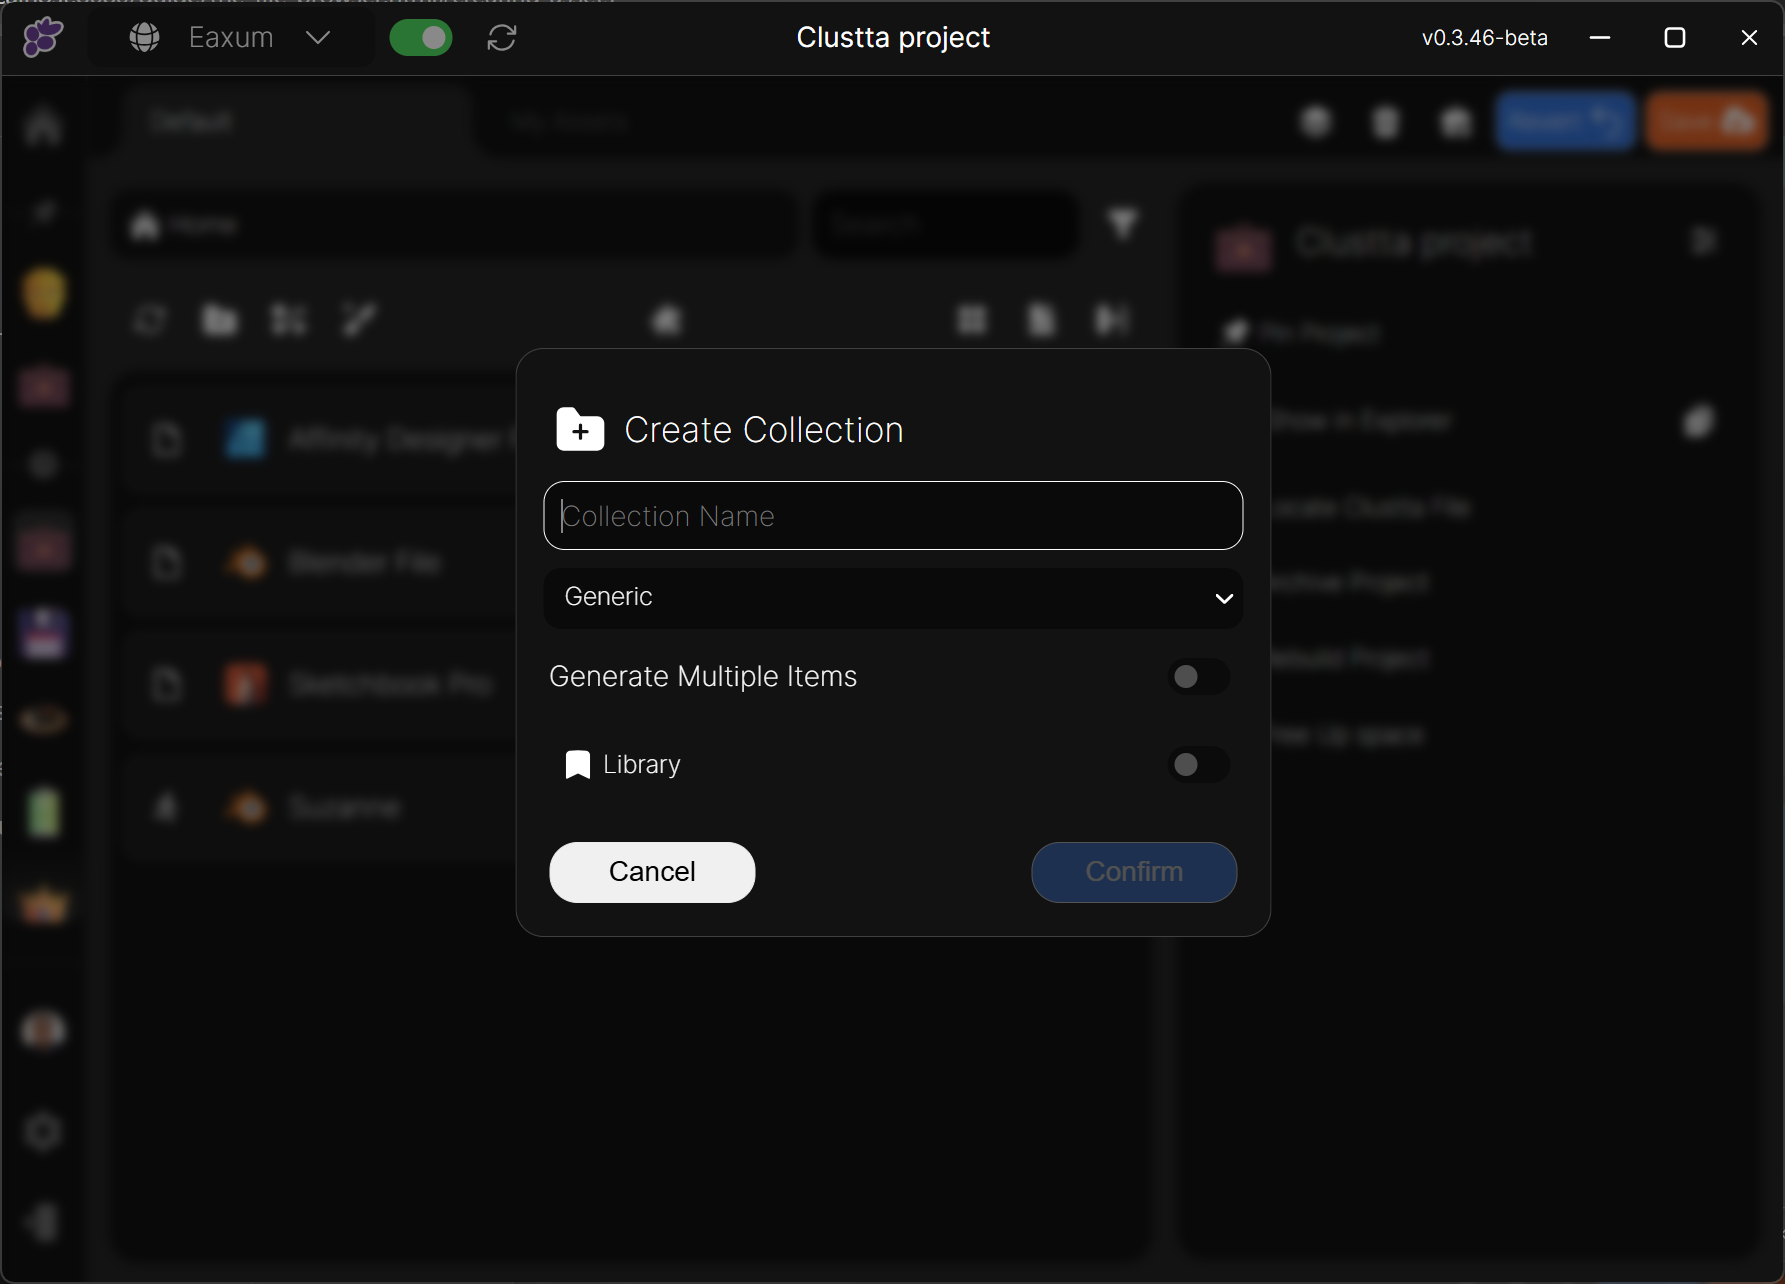
Collection Metadata
• Name — A unique name for your collection.
• Collection Type (Optional) — Defaults to Generic. Useful for classifying and filtering collections, e.g., Designs, Renders, Characters, etc.
• Library (Optional) — When Library is toggled, every collaborator on the project will have access to the collection and all of it's contents regardless of whether they were directly assigned to it.
- When you are satisfied, click the Confirm button to create the collection.